
Today I spent an afternoon preparing my very first eco kitchen sponge. I was inspired by a friend who managed to go fully zero waste (and who will soon be featured in my blog). And I though that the coronavirus confinement is the best ‘downtime’ to give it a go.
Why an eco kitchen sponge?
There are many reasons why. Here are my 5 motivators:
- Zero waste – I am very far from reaching zero waste target but by making my own sponge I am able to avoid getting shop bought ones and I’am able to waste less. These sponges can be washed and reused for a long period of time.
- Reusing – the eco kitchen sponges can be made from old socks and tights. This is such a nice way of reusing old materials always available at home avoiding binning old garment.
- Plastic free – I have so far never managed to find an affordable kitchen sponge that wouldn’t be packed in plastic. I am sure it’s possible to get it in pricey organic shops. But I am trying to keep realistic and come up with inexpensive ideas that won’t break the bank.
- Chemical free – have you ever asked yourself what the sponges are made of? Honestly, it has never crossed my mind. Actually many of them are produced from micro plastics with frequently added chemicals. They’re not only adding up to tonnes of waste but might have impact on our health.
- Fun activity – I made my eco kitchen sponge with my daughter not only spending a nice afternoon together but also teaching her about go green ideas.
Eco kitchen sponge step-by-step
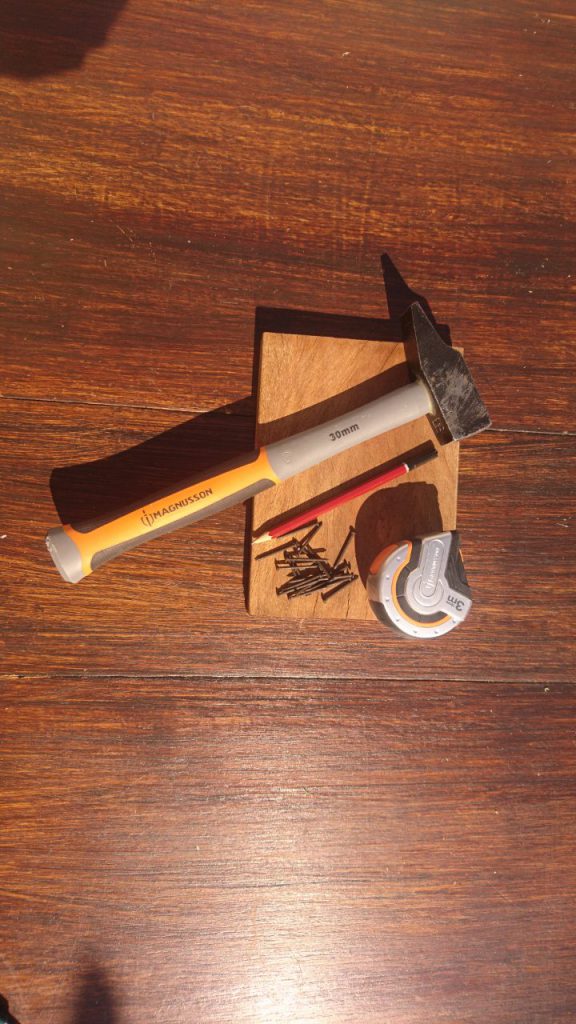
What do you need
- Wooden board (20 x 20cm – but any size really will be OK)
- Nails (I used 25)
- Old tights or socks (I found old winter tights full of holes)
- Hammer
- Ruler
- Scissors
- Pencil
Method
- When you make your own sponge it might take a bit longer as you will need to prepare your own board. But you will be reusing afterwards.
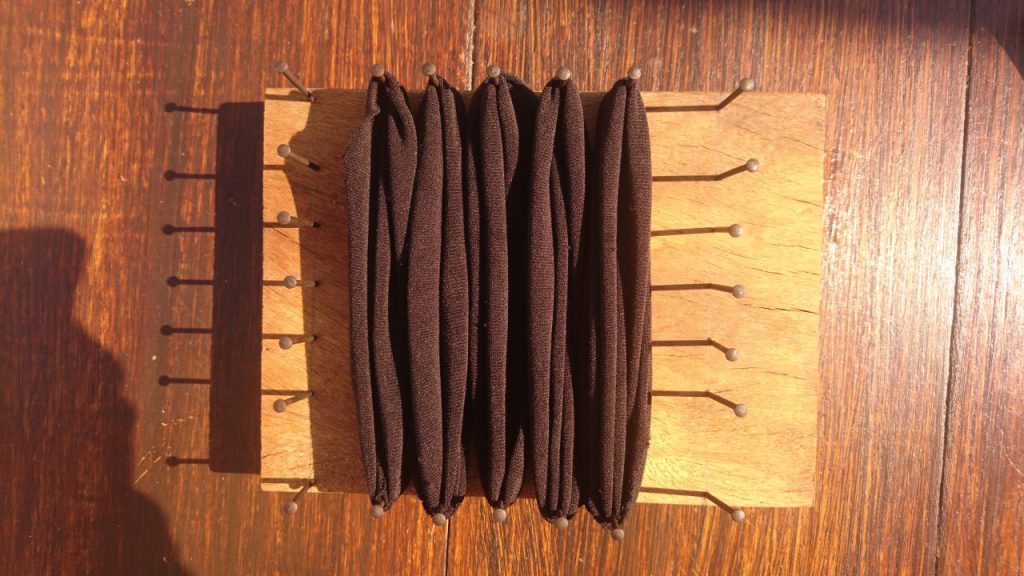
- Measure your 14 x 14cm square and mark it with a ruler on your wooden board.
- Measure and mark where you will be planting nails. I did 3cm gap for the first nail and then 2cm for each one after. Now it is time to plan the nails.
- Cut your old garment into ten 8cm wide stripes.
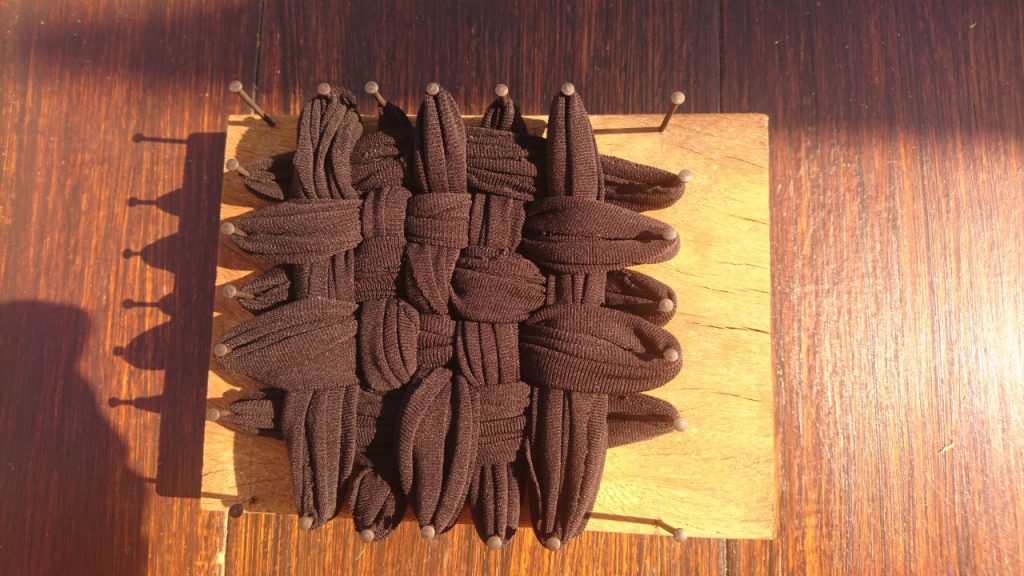
- Attach the stripes vertically first. Then start adding them horizontally in and out of the vertical stripes (going under and over to create a nice pattern).
- Now it is time to make a nice edge of the sponge by unhooking a stripe from its nail and then unhooking a second stripe right next to it. Hold on to the second stripe and let go of the first stripe. The second stripe now becomes the first one. Continue this step all around your square. Make it tighter each time,
- Continue until you used all the material. The final step will create a nice neat hook to hang your sponge on.
More ideas
Interested in other natural products? Make your own natural toilet cleaning blocks or try a homemade lip balm.